How Micro-Cracks in Work Rolls Lead to Strip Surface Defects
Formation of Micro-Cracks
Micro-cracks in work rolls are primarily caused by the combined effects of thermal fatigue, mechanical stress, and chemical interactions during the rolling process. These tiny fractures typically begin at the surface of the roll, where it is most exposed to temperature fluctuations and high mechanical forces. As the roll experiences cyclic heating and cooling during each pass of the metal strip, these thermal stresses cause minute fissures to form. Additionally, the high pressures exerted on the roll surface during rolling further exacerbate the development of micro-cracks. Over time, the repeated cycling between extreme heat and pressure encourages these small cracks to propagate inward from the surface, gradually weakening the roll’s structural integrity.
Propagation of Surface Defects
As micro-cracks continue to expand, they can transfer imperfections directly onto the metal strip being processed. This occurs when the damaged areas of the roll come into contact with the hot, malleable metal. The interaction between the cracked roll surface and the strip can lead to visible defects on the final product. These defects often appear as scratches, indentations, or patterned marks on the strip surface. In severe cases, the roll’s damage can cause deeper or more pronounced imperfections, which can severely impact the quality of the material being processed. The extent of the damage on the strip will depend on the severity and depth of the micro-cracks in the roll itself.
Impact on Product Quality
The defects introduced by micro-cracks in work rolls can have significant consequences on the final product’s quality. Aesthetic flaws such as scratches or indentations can diminish the visual appeal of the rolled material, which is especially critical in industries where appearance matters, such as automotive or high-end consumer goods manufacturing. However, the effects are not just superficial. Surface defects can also compromise the mechanical properties and performance characteristics of the material. In applications requiring high precision or strength, such as in aerospace or precision equipment manufacturing, even minor defects can result in product rejection, costly rework, and substantial financial losses. Therefore, the formation and propagation of micro-cracks in work rolls must be carefully managed to ensure product integrity and minimize production downtime.
Why Roll Diameter Tolerances Directly Affect Gauge Accuracy
Importance of Precise Roll Diameter
The diameter of work rolls is a critical factor in ensuring the accuracy of the gauge during the rolling process. Even small variations in roll diameter can lead to noticeable deviations in the thickness of the final rolled material. This is because the final thickness is determined by the gap between the rolls, and any changes in roll diameter directly affect the size of this gap. A precise and uniform roll diameter ensures that the thickness of the rolled material remains consistent and meets the required specifications. In industries where exact measurements are essential, such as the production of automotive parts or aerospace components, maintaining precise roll diameters is key to achieving high-quality products.

Effects of Wear on Diameter Tolerances
Over time, work rolls undergo wear due to the constant pressure, heat, and friction they are exposed to during the rolling process. This wear leads to a gradual reduction in the roll diameter, which can affect the uniformity of the rolling process. The decrease in diameter is often uneven across the roll’s surface, causing variations in the rolling gap. As a result, the thickness of the material being rolled can become inconsistent, with variations in gauge occurring along the width or length of the strip. These discrepancies can cause significant quality issues and may even result in material being outside of acceptable tolerance limits. This wear-induced change in roll diameter, if not addressed, can lead to defects in the final product, making it unsuitable for certain applications.
Maintaining Gauge Consistency
To maintain consistent gauge accuracy, it is essential for rolling mill operators to closely monitor and adjust for any changes in roll diameter. This requires regular inspection of the rolls to detect wear and ensure that diameter tolerances remain within the desired range. Operators may employ advanced techniques such as roll grinding to restore the rolls to their original specifications or implement roll changing strategies to minimize downtime and maintain consistency. Additionally, real-time measurement and control systems can be used to monitor the thickness of the material continuously, allowing operators to make adjustments as needed. By taking these proactive steps, manufacturers can maintain tight control over roll diameter and improve the overall quality and consistency of their rolled products, ultimately leading to higher productivity and reduced scrap rates.
Non-Destructive Testing Methods for Early Work Roll Degradation
Ultrasonic Testing Techniques
Ultrasonic testing is a widely used non-destructive method for detecting early signs of work roll degradation. This technique involves sending high-frequency sound waves through the roll material and analyzing the reflected signals. By interpreting these signals, technicians can identify internal defects, such as micro-cracks or material inconsistencies, before they manifest as visible surface problems. Ultrasonic testing is particularly effective for detecting subsurface flaws that may not be apparent through visual inspection alone.
Eddy Current Analysis
Eddy current testing is another valuable non-destructive method for assessing work roll condition. This technique relies on electromagnetic induction to detect surface and near-surface defects in conductive materials. By applying an alternating magnetic field to the roll surface, technicians can analyze the induced eddy currents to identify irregularities that may indicate early stages of wear or damage. Eddy current analysis is particularly useful for detecting surface-breaking defects and evaluating the overall surface condition of work rolls.
Thermographic Inspection
Thermographic inspection utilizes infrared imaging to detect temperature variations across the work roll surface. This method can reveal areas of abnormal heat distribution, which may indicate underlying defects or wear patterns. By identifying hotspots or irregular thermal patterns, operators can pinpoint potential problem areas before they lead to significant quality issues. Thermographic inspection is especially valuable for detecting thermal fatigue and assessing the overall health of the roll's surface layer.
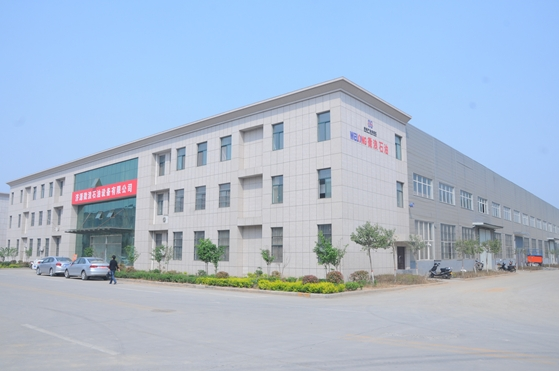
Source: CHINA WELONG-Oilfield tools Manufacturer
FAQ about Work Roll
What factors contribute to work roll wear?
Work roll wear is influenced by various factors, including the rolling temperature, applied forces, material properties of the rolled product, cooling conditions, and the roll material itself. Chemical interactions between the roll surface and the processed material, as well as abrasive particles in the rolling environment, can also accelerate wear.
How often should work rolls be replaced or refurbished?
The frequency of work roll replacement or refurbishment depends on several factors, such as the type of material being rolled, production volume, and quality requirements. Generally, rolls are replaced or refurbished when their surface condition deteriorates to a point where it affects product quality or when the roll diameter falls below acceptable tolerances. This can range from several days to several weeks, depending on the specific application and operating conditions.
What are the latest advancements in work roll materials?
Recent advancements in work roll materials include the development of high-chromium steel alloys with improved wear resistance and thermal stability. Ceramic-coated rolls have also gained popularity for certain applications due to their exceptional hardness and resistance to thermal fatigue. Additionally, composite rolls combining different materials in layers are being used to optimize both wear resistance and toughness.
In conclusion, understanding and managing work roll wear is crucial for maintaining high-quality output in rolling mill operations. By implementing effective monitoring, maintenance, and testing strategies, operators can minimize the impact of wear on product quality and maximize the efficiency of their rolling processes. For more information on work rolls and related oilfield products, please contact us at oiltools15@welongpost.com. Welong is committed to providing top-quality solutions for the oil and gas industry, ensuring optimal performance and reliability in your rolling mill operations.


