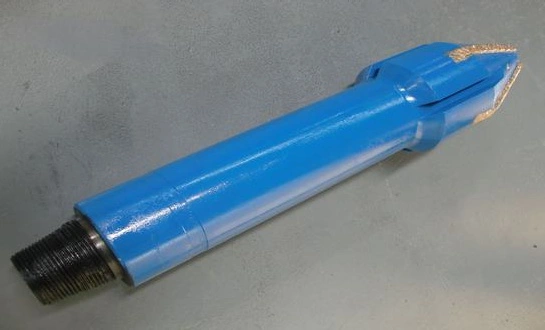
How to maintain Float Shoe?
Maintaining a float shoe is essential to ensure its longevity and optimal performance in the oil and gas drilling process. Regular maintenance of a float shoe can prevent premature wear, reduce the risk of failure during operations, and minimize downtime. To maintain a float shoe effectively, it’s important to inspect it regularly for any signs of damage or wear. Ensure that it is cleaned thoroughly after each use and stored in a dry, safe environment. Lubrication is another crucial aspect to consider, as it prevents corrosion and helps keep the float shoe moving smoothly. In addition, addressing any corrosion or wear issues promptly is key to extending the tool’s lifespan. Through these practices, the float shoe remains reliable and efficient, ultimately contributing to the smooth progression of your drilling operations.

What Are the Essential Steps for Float Shoe Maintenance?
Maintaining a float shoe requires a systematic approach to ensure it performs at its best throughout its service life. The following are key steps to take when caring for a float shoe:
Regular Inspections
The first and most important step in float shoe maintenance is conducting regular inspections. You should check for cracks, wear on the exterior, and any signs of deformity that might compromise its functionality. Pay particular attention to the valves and the check valve mechanism, as these are essential for the float shoe’s ability to maintain pressure and prevent backflow during the cementing process. If any abnormalities are found, it is crucial to replace or repair the damaged parts before using the float shoe again.
Cleaning and Rinsing
After each use, cleaning the float shoe is essential to prevent the buildup of debris, cement, or other residues that could damage the tool. Use clean, non-abrasive materials to remove any stuck substances. Rinse the shoe thoroughly with water, ensuring that all internal and external components are free from particles. A good cleaning regimen can significantly reduce wear and tear, keeping the float shoe in good condition for a longer time.
Proper Lubrication
Lubrication plays a significant role in preventing corrosion and ensuring smooth operation. Apply a lubricant that is compatible with the materials of the float shoe and the environment it operates in. Ensure that you lubricate the valve mechanisms, seals, and other moving parts regularly. This helps to prevent friction and wear, particularly in high-pressure environments.
Storage Conditions
Storing the float shoe properly when it is not in use is just as important as its maintenance. Keep the shoe in a dry, clean environment where it is not exposed to extreme temperatures or moisture. Moisture can lead to corrosion, while exposure to high temperatures may damage seals and other components. A secure storage location will help prolong the life of the float shoe and ensure that it is ready for use when needed.
Timely Replacement of Worn Components
Even with the best maintenance practices, some parts of the float shoe will eventually wear out over time. It’s important to replace components like the check valve, valve seats, or any seals that show signs of deterioration. By keeping track of the shoe's usage and wear, you can schedule timely replacements and avoid costly downtime due to a malfunctioning float shoe.
By following these essential steps, you can ensure that your float shoe remains in top working condition, allowing for reliable and effective performance during your drilling operations.
How Can You Inspect a Float Shoe for Damage or Wear?
Regular inspection of a float shoe is critical to maintaining its functionality and safety in oil and gas operations. The primary goal of this inspection is to identify any signs of damage, wear, or deterioration that could compromise its performance. Here's a step-by-step guide to inspecting a float shoe for damage or wear:

Visual Inspection for Cracks and Deformities
Start with a thorough visual inspection of the entire float shoe, including the body, valves, and seals. Look for any visible cracks, dents, or deformations in the metal or plastic parts. Cracks, especially those near high-stress areas like the valve seat or check valve, are a sign that the float shoe may have been subjected to excessive pressure or impact. Even small cracks can escalate into bigger issues, so any visible damage should be a cause for concern.
Check the Valve Mechanism
One of the most crucial components of the float shoe is its valve system, which prevents the backflow of cement and other materials. Inspect the check valve and valve seat carefully for wear or damage. If the valve is damaged or worn down, it could result in fluid leakage, compromising the integrity of the cementing operation. Ensure that the valve moves freely without obstruction and that there’s no sign of corrosion or build-up around it.
Examine the Seals and O-Rings
The seals and O-rings play an essential role in preventing leaks and maintaining the float shoe’s functionality under pressure. Check these components for any signs of wear, cracking, or degradation. O-rings can become brittle or damaged over time, especially when exposed to harsh chemicals or extreme temperatures. If seals or O-rings show signs of damage, they should be replaced immediately.
Inspect for Corrosion
Corrosion can weaken the structural integrity of the float shoe and its components. Look for any signs of rust or oxidation, especially on the metal parts. Corrosion can develop in high-moisture environments or if the float shoe is not cleaned or stored properly after use. If corrosion is detected, it’s important to address it promptly to prevent further damage.
Check for Blockages
Inside the float shoe, there are passages and channels that allow fluid flow. Inspect these internal passages for any blockages or obstructions that could impede the flow of fluids. Blockages can be caused by cement build-up or foreign debris, and they could compromise the shoe’s functionality. Use a non-abrasive cleaning tool to clear out any blockages carefully.
Pressure Testing
In some cases, a pressure test can help determine if the float shoe is still capable of maintaining pressure as required. Pressure testing involves applying a specified amount of pressure to the float shoe to see if it holds up without leaking or failing. This test can give you a clear indication of whether the float shoe is still functioning properly or if it needs to be replaced.
By performing a thorough inspection based on these guidelines, you can ensure that any potential issues are detected early, preventing costly failures during your drilling operation.
What Is the Best Way to Clean and Store a Float Shoe?
Proper cleaning and storage are crucial to extending the life of a float shoe and ensuring that it remains in optimal condition for future use. Proper cleaning prevents the build-up of debris, cement, or other residues that could cause corrosion or impede the shoe's performance, while correct storage minimizes exposure to environmental factors that could lead to damage. Here’s how to clean and store your float shoe effectively:
Cleaning Process
After each use, clean the float shoe thoroughly to remove cement, mud, or debris. Flush both internal and external surfaces with clean, contaminant-free water. Use a soft cloth or non-abrasive brush to gently scrub away any build-up. Avoid harsh chemicals or abrasives that can damage the surface or seals. For significant build-up, consider using a mild detergent designed for oilfield tools, but ensure it is safe for rubber seals. Rinse with water to remove any cleaning solution.

Inspection During Cleaning
While cleaning, inspect the float shoe for any visible signs of damage, such as cracks, corrosion, or wear on the valves and seals. This step helps identify potential issues that might not be obvious during routine inspections, allowing for timely repairs before reusing the equipment.
Drying the Float Shoe
Once cleaned, dry the float shoe completely to avoid moisture-related damage like rust or corrosion. Use a dry cloth to wipe surfaces, then let it air dry in a well-ventilated area. Ensure the shoe is fully dry before storage to prevent long-term damage from lingering moisture.
Storage Conditions
After cleaning and drying the float shoe, store it in a cool, dry place, away from direct sunlight, moisture, and extreme temperatures. A temperature-controlled environment is ideal to prevent damage to seals and components. Ensure the storage area is free of dust, dirt, and chemicals that may degrade the tool. If storing for long periods, periodically inspect the float shoe to ensure it remains in good condition. Using a protective covering can shield the shoe from physical damage, like impacts or abrasion.
Use of Protective Coating
For added protection, apply a specialized protective coating to the float shoe, especially if it will be stored for an extended period. These coatings help prevent corrosion and wear by creating a barrier against moisture and chemicals. Proper cleaning, storage, and coating ensure the float shoe maintains its performance and durability for future use.
What Are the Recommended Lubrication Practices for Float Shoes?
Lubrication is a critical part of float shoe maintenance, as it reduces friction, prevents corrosion, and helps ensure that the tool functions smoothly under pressure. Proper lubrication practices not only extend the life of the float shoe but also improve its efficiency, particularly during high-pressure and high-temperature operations. Here are the recommended lubrication practices for maintaining your float shoe:
Choose the Right Lubricant
Select a lubricant that is compatible with the float shoe’s materials and operating conditions. For high temperatures, use a lubricant that can withstand heat without breaking down. In corrosive environments, choose a lubricant with added protection against corrosion. Petroleum-based lubricants are commonly used in the oil and gas industry for their heat resistance, while synthetic lubricants may offer better performance in extreme conditions.
Lubricate Moving Parts Regularly
The valve mechanism and seals are the most crucial moving parts that need regular lubrication. Apply lubricant to the check valve, valve seat, and other components like seals and O-rings to prevent wear, friction, and cracking. Depending on usage, lubricate these parts after each use or at regular intervals. For high-demand operations, more frequent lubrication may be necessary to maintain optimal performance.
Avoid Over-Lubrication
While lubrication is important, over-lubricating the float shoe can cause dust, dirt, and debris to accumulate, leading to blockages or performance issues. Apply a thin, even layer of lubricant to all necessary parts to avoid excess. Over-lubrication can also lead to lubricant dripping onto other equipment, causing contamination or unnecessary wear.

Check Lubricant Compatibility
Ensure that the lubricant you are using is compatible with the materials in the float shoe. Some lubricants may contain chemicals that can degrade rubber seals or other components over time. Check the manufacturer’s guidelines to ensure that the lubricant you use will not cause any negative effects on the float shoe’s seals, O-rings, or other sensitive components. Using incompatible lubricants can lead to premature failure of these parts, which could result in costly repairs or replacement.
Use Lubricants in Moderation and Consistently
Establish a lubrication schedule based on the usage and wear patterns of the float shoe. Tools that are used frequently or in harsh conditions may require more frequent lubrication, while those used less often may only need periodic attention. Consistent lubrication will prevent parts from wearing out too quickly and help maintain the float shoe’s smooth operation.
Additionally, after each use, it’s a good idea to inspect the lubrication status and top it up if needed. This will ensure that the float shoe is ready for its next operation without any risk of insufficient lubrication.
By following these recommended lubrication practices, you can significantly reduce friction, prevent wear, and maintain the float shoe’s reliability. This essential maintenance step will help ensure that your float shoe continues to perform effectively and extends its service life.
What Should Be Done if a Float Shoe Shows Signs of Corrosion?
Corrosion is one of the most significant threats to the longevity and functionality of a float shoe. When exposed to moisture, chemicals, or harsh environmental conditions, the metal parts of the float shoe can begin to corrode, weakening its structure and reducing its effectiveness during operations. Promptly addressing corrosion is essential to prevent further damage and ensure the tool continues to perform as expected. Here’s what you should do if you notice signs of corrosion on your float shoe:
Assess the Severity of Corrosion
When corrosion is detected on a float shoe, the first step is to evaluate its extent. If the corrosion is only superficial, cleaning methods such as brushing or using a corrosion remover may suffice. However, if it has affected critical components like valves or seals, replacement may be necessary. For non-critical areas, repair might be possible depending on the damage.
Remove Corrosion Safely
To eliminate surface corrosion, use tools like a wire brush, abrasive pad, or a specialized corrosion remover. Ensure that any chemical product used is compatible with the float shoe’s materials to avoid damaging seals or O-rings. Apply gentle force during cleaning to prevent scratches or further damage. After cleaning, rinse the float shoe thoroughly with water and allow it to dry before re-lubricating.
Apply Protective Coatings
Once corrosion is removed, it’s crucial to apply a protective coating to prevent future corrosion. Rust inhibitors or anti-corrosion coatings act as a barrier between the metal and environmental elements, protecting against further damage. Choose a coating that is compatible with the float shoe materials and can endure the operational conditions it will face, including temperature and pressure changes.
Use Corrosion Inhibitors for Ongoing Protection
Incorporate corrosion inhibitors into your regular maintenance routine. These chemicals can be added to lubricants or cleaning solutions, forming a protective layer on the metal surface to reduce oxidation and rust. Consistent use of corrosion inhibitors will help maintain the float shoe’s resistance to corrosion, especially in harsh environments.
Replace Severely Corroded Parts
If the corrosion has significantly weakened any of the float shoe’s key components, such as the valve, seals, or the body, replacement may be necessary. While some corrosion can be removed, excessive corrosion that compromises the functionality or safety of the tool requires the affected parts to be replaced. For instance, if the corrosion has penetrated the valve seat, leading to improper sealing or loss of functionality, replacing the valve or the entire float shoe may be the most effective solution.
Prevent Future Corrosion
To prevent future corrosion, always ensure that the float shoe is cleaned and stored properly. Moisture is one of the main contributors to corrosion, so it’s vital to keep the float shoe dry and free from exposure to elements that could promote rust or oxidation. Additionally, apply lubricants and corrosion inhibitors regularly, especially when storing the float shoe for an extended period.
By addressing corrosion promptly and taking steps to prevent it, you can maintain the float shoe’s performance and prevent costly repairs or replacements in the future. Proper maintenance and care will ensure that the tool remains reliable, even in harsh operating conditions.
What Are the Common Maintenance Mistakes to Avoid with Float Shoes?
Proper maintenance of a float shoe is essential to its longevity and effective performance, but even the best-maintained tools can fall victim to common mistakes that undermine their integrity. These errors, though often unintentional, can lead to premature wear, poor performance, or costly failures. Here are some common maintenance mistakes to avoid when handling float shoes:
Neglecting Regular Inspections
One of the most significant mistakes is failing to conduct regular inspections of the float shoe. Regular inspections are critical for identifying early signs of wear, damage, or corrosion. Skipping inspections can lead to unnoticed issues that may cause a malfunction during critical operations. Always inspect your float shoe before and after each use to ensure it is in proper working condition. Failure to spot early signs of damage could result in a tool failure that halts operations and incurs unnecessary downtime.
Using the Wrong Cleaning Methods
Using abrasive tools, harsh chemicals, or incompatible cleaning solutions is another mistake that can damage the float shoe. The use of harsh cleaning agents or abrasive scrubbing tools can scratch or erode the surface of the float shoe, potentially damaging seals or valves. To avoid this, always use non-abrasive cleaning materials and make sure the cleaning agents are safe for use on the float shoe’s specific materials. Additionally, never use corrosive chemicals, as they can accelerate corrosion and degrade the shoe’s components over time.
Overlooking Lubrication Needs
Under-lubrication is just as harmful as over-lubrication. Failing to apply the proper amount of lubricant can lead to excessive friction, which will wear out seals, valves, and moving parts faster. On the other hand, over-lubrication can attract debris and contaminants, leading to blockages and reduced performance. Apply lubricant carefully and ensure that it is evenly distributed, focusing on the moving parts like the check valve and seals. Be sure to use the right type of lubricant for the operating conditions, as using the wrong product can cause more harm than good.
Improper Storage Conditions
Storing the float shoe in an unsuitable environment is a common mistake that can lead to damage, corrosion, or degradation. Exposing the float shoe to moisture, extreme temperatures, or excessive sunlight can weaken seals, cause corrosion, or even warp the tool. Always store the float shoe in a dry, cool place, and avoid placing it in areas where it may be exposed to direct sunlight or temperature extremes. Protective coverings or cases are also helpful in keeping the tool safe from physical damage.
Ignoring Corrosion Prevention
Corrosion is one of the leading causes of float shoe failure, and failing to take preventive measures can lead to costly repairs or replacements. Always check for corrosion after each use and address any issues immediately. If you notice signs of rust or oxidation, take action by cleaning the affected areas and applying protective coatings or corrosion inhibitors. Regular maintenance should include proactive measures to prevent corrosion, especially in humid or chemically aggressive environments.
Using Incompatible Parts for Repairs
Another common mistake is using non-standard or incompatible replacement parts when repairing a float shoe. Using the wrong components, such as seals, valves, or O-rings, can compromise the performance and safety of the float shoe. Always ensure that any replacement parts are specifically designed for the model and type of float shoe you’re using. Using high-quality, compatible parts will ensure the tool functions as intended and reduce the risk of failure during operation.

Failure to Follow Manufacturer Guidelines
Each float shoe comes with its own set of maintenance guidelines from the manufacturer. Failing to follow these instructions can lead to improper care, damaging the tool or voiding warranties. Be sure to consult the manufacturer’s maintenance recommendations regularly and adhere to their guidelines. This includes specific instructions on cleaning, lubrication, inspection intervals, and any other relevant practices. Following these guidelines will ensure that you maintain the float shoe correctly and extend its lifespan.
By avoiding these common maintenance mistakes, you can maximize the performance, safety, and longevity of your float shoe. Regular care and attention will keep the tool in top working condition, ensuring that your drilling operations run smoothly and efficiently.
Conclusion
Proper maintenance of a float shoe is essential to its performance and longevity. Regular inspections, proper lubrication, timely repairs, and correct storage can prevent common issues like wear, corrosion, and mechanical failure. By adhering to the right maintenance practices, you ensure the float shoe remains reliable during critical operations, ultimately improving efficiency and minimizing downtime. Taking proactive steps in maintaining this vital piece of equipment will save both time and money in the long run.
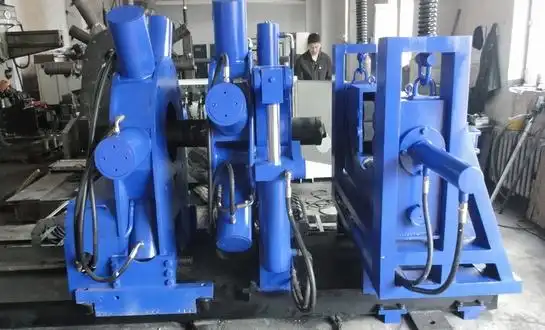
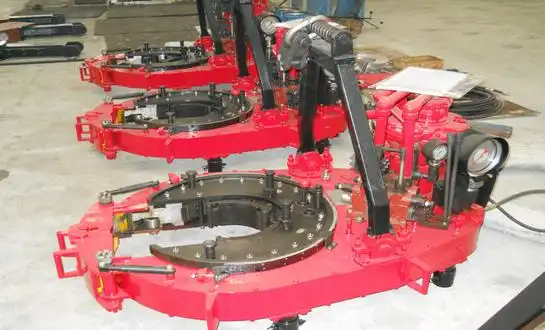
At WELONG, we provide high-quality taper mills and other oilfield products that are built to withstand even the most demanding conditions. With over 20 years of experience in providing customized solutions, we offer reliable, cost-effective products designed to improve your drilling efficiency. For more information on how to properly maintain your float shoe or to inquire about our oilfield products, feel free to contact us at oiltools15@welongpost.com.
References
1. Jones, M., & Green, T. (2018). "A Comprehensive Guide to Float Shoe Maintenance in Drilling Operations." Journal of Oilfield Technology, 35(2), 78-82.
2. Smith, R. (2020). "Corrosion Management in Oilfield Equipment: Best Practices." International Journal of Corrosion Science, 45(7), 2145-2157.
3. Brown, J. D. (2019). "Lubrication and Maintenance of Downhole Tools: An Industrial Perspective." Oil & Gas Engineering, 48(5), 201-210.
4. Peterson, A., & White, S. (2017). "Practical Guidelines for Tool Storage and Maintenance in Drilling Operations." Oilfield Maintenance Handbook, 9(3), 134-140.
5. Taylor, P. (2021). "Minimizing Equipment Downtime: Best Practices for Oilfield Tool Maintenance." Journal of Drilling & Completion Technology, 22(1), 56-65.
6. Morris, L., & Walker, E. (2022). "Corrosion Prevention for Oilfield Equipment: Effective Strategies for Float Shoes." Oilfield Safety Review, 33(4), 99-104.

CHINA WELONG - 20+ years manufactuer in oilfield tools